
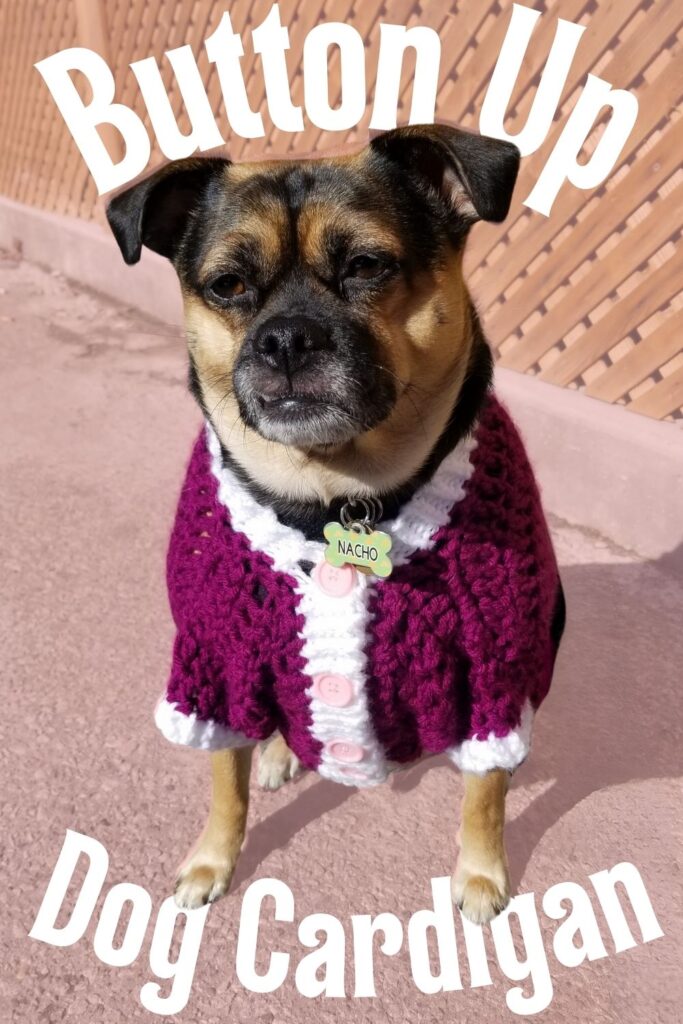
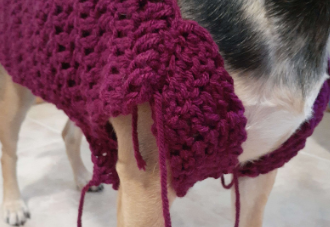
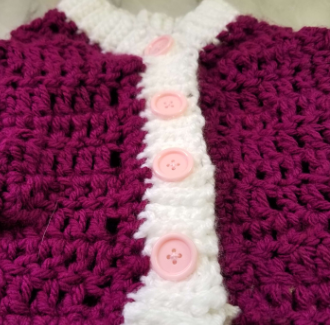
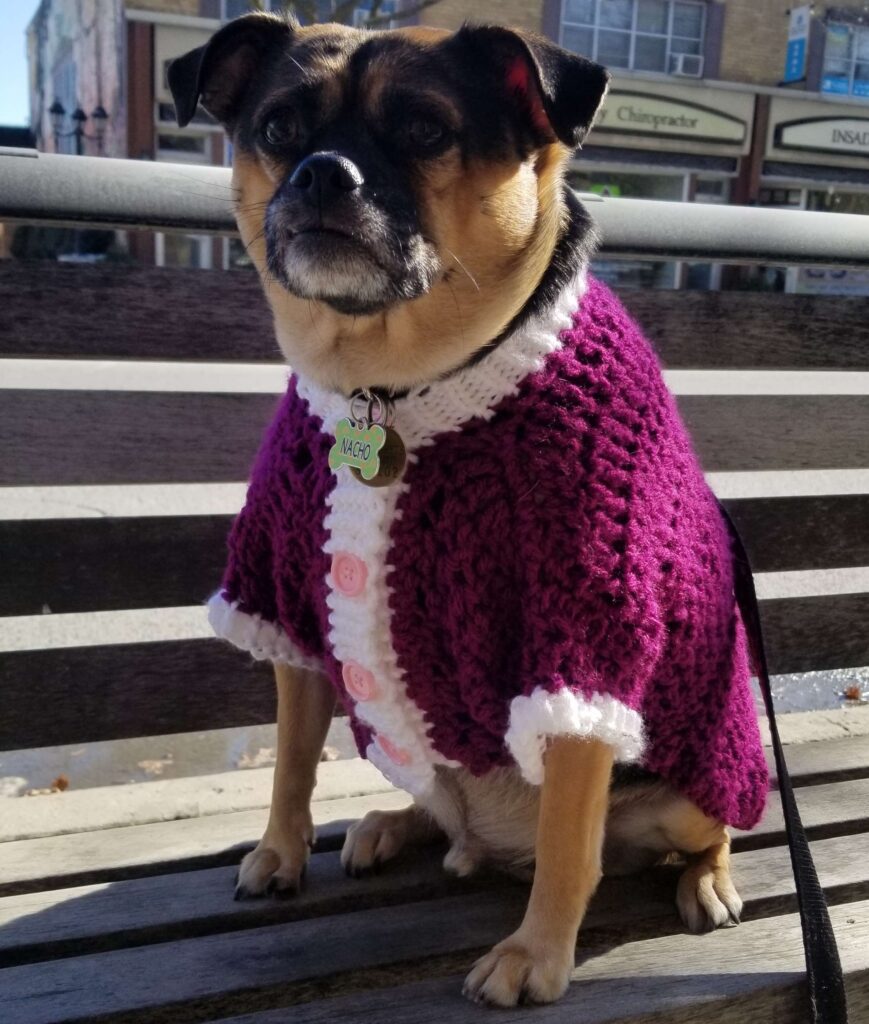
This sweet little cardigan is so fun to make. A button up for your dog? Sign us up! Complete with a contrasting button band and sleeve cuffs, this cardi is the cutest we’ve ever made.
Craft: Crochet
Difficulty: Intermediate
Materials: Knit Picks Brava Bulky in MC Fairy Tale, CC White, tapestry needle, buttons, removable stitch markers
Techniques: crocheting in the round, crocheting flat, seaming crochet pieces, picking up stitches, and sewing on buttons.
Gauge: 14 stitches and 7 rows of dc = 4 x 4 inches
Hook Size: 8mm
Sizes: Instructions written to fit any size.
Finished Measurements: Sample fits chest circumference of 26″.
Yardage: Total: 255 yd / 234 m
MC: 200 yd / 183 m
CC: 55 yd / 51 m
Includes: written instructions, photos
Measurements Needed:
Shoulder to shoulder across back.
Across chest, armpit to armpit.
Along back from collar to just above tail.
Also available on: 🧶Ravelry 👛Etsy 💜Ribblr
Elevate your inbox: Access freebies and top-notch tutorials first!
Abbreviations:
ch(s) – chain(s)
sc – single crochet
dc – double crochet
st(s) – stitch(es)
slst – slip stitch
sk – skip
dec – decrease
blo – back loop only
MC – main colour
CC – contrast colour
Please note chains at beginning of row / round never count as a stitch. If possible, try cardigan on the dog as much as possible to ensure the most comfortable fit.
Begin Pattern:
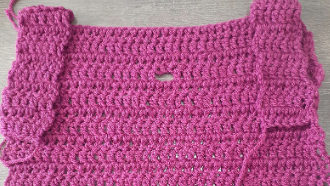
Back Panel (make 1):
Work in MC
Row 1: ch same length as measurement #1. Ch3 to turn, dc in 4th ch from hook. Dc across.
If leash hole isn’t required, skip this step:
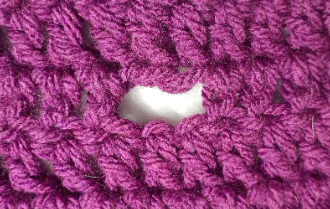
Continue dc rows up to leash hole. To find placement of leash hole, divide current stitch count by 2.
If the result is even, dc across 1 less than it. Ch2, sk2, dc to end.
If the result is odd, round decimal down. Dc across 1 less than it. Ch3, sk3, dc to end.
In next row, 1dc into each ch.
Work dc rows until edge of sweater reaches dog’s thigh whilst sitting. The top of the sweater should rest where their collar does.
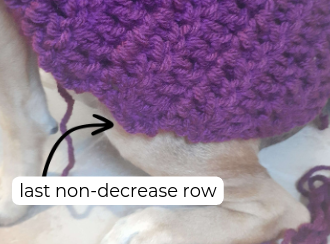
dc dec at start and end of each row until back panel reaches dog’s tail when sitting.
Fasten off.
Front Panel (make 2):
Work in MC
Row 1: ch roughly 1/3 of measurement #2. Ch3, dc in 4th ch from hook. Dc across.
Continue dc rows until, when pinned to top and side of back panel, the armhole fits the dog’s leg comfortably.
Once armholes fit comfortably, add stitch markers where they will attach on both the back and front panel. Continue to crochet until the panel covers the dog’s belly.
Fasten off.
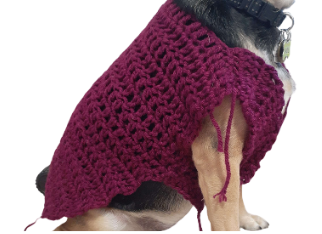
Attach Front Panel to Back Panels:
Sew them together using the mattress stitch, or crochet them together with a sc or slst join.
SC Border:
In MC, sc around edge of entire project.
While crocheting the sc border:
- When crocheting into the side of a dc, do 2sc per dc.
- When crocheting into top or bottom of dc, only 1sc is needed.
- When turning onto final row of the back panel, 2sc in last st before turning. sc across until 1st remains. 2sc in last st, continue crocheting along side of panel.
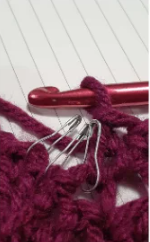
When turning the corner between front and back panels, pick up an extra loop or two in the seam during a sc. Finish stitch with yo, pull through all loops on hook.
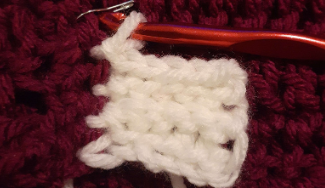
Ribbing:
Place markers on both front panels where each button- and respective button hole- will be placed.
Pictured is markers ~2in apart.
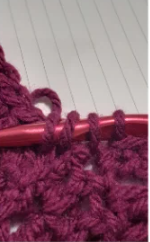
Ch the desired width of the ribbing. ch1 and turn, slst across. Slst into next sc. Treat this as a turning ch and turn your work, slst in blo across.
Repeat this until first buttonhole row.
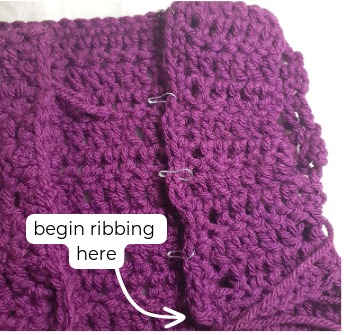
Slst across as normal. On return row for each buttonhole, slst 1-2 st. ch across the middle 2-3 st of your row and sk the same amount. Slst across and continue as normal.
- Test size by passing one of the buttons through. It should fit snugly.
Continue until button band is done. From there on, continue slst ribbing as normal. Keep markers on button side in.
Sleeves:
In MC, pick up sts along edge of sleeve holes. This is the same as the sc border done earlier. Once done, slst to first sc.
ch3, (dc, dc dec) around. It doesn’t matter if this row ends on a dc or a dec.
slst to first dc of row. ch3 and dc around. If your dog’s legs are longer, more dc rows may be needed.
Once desired sleeve length is achieved, fasten off MC.
In CC crochet ribbing, done with the same technique as used for the collar / button band. This ribbing is only a few sts wide.
When ribbing is complete, slst together first and last rows to join.
Fasten off.
Finishing:
Sew buttons onto button band using markers placed earlier as guides for which row to sew them onto.
Once done, weave in all ends.
Congratulations on crocheting your very own Wonderstruck Dog Cardigan!
Recent Posts:
Your links don’t work to get this pattern on Ravelry. I did a search on Ravelry and this doesn’t seem to be there. It’s supposed to be the free pattern for March 12 for the Crochet for Pets Blog Hop.
There was an issue with the link but it’s fixed and ready to go now. I am so sorry that happened.