
This granny square dog coat is a great beginner project, entirely made up of – wait for it …. granny squares! Shocking, right?! 😂 It’s a fun make because you only need to know a few stitches and you’ll get better and better at them the more squares you make. Once you’ve made a pile of these squares, there’s all kinds of things you can make with them. Here we’ll show you how to make them into a cute dog coat! Details below, including video tutorials (and links to the full PDFs).
Craft: Crochet
Difficulty: Beginner
Materials: Paintbox Simply DK in
Tapestry needle
Buttons to match
Removable stitch markers (optional)
Techniques: chains, double crochets, treble crochets, slip stitches, single crochet, seaming
Gauge:
Hook Size: 3.5mm
Includes: written instructions, video
Also available on: 🧶Ravelry
Never miss a freebie, discount code or video tutorial!

Abbreviations:
ch(s) – chains
dc – double crochet
tr – treble crochet
rep – repeat
sl st – slip stitch
sp – space
chsp – chain space (the space create by a ch)
st(s) – stitch(es)
yo – yarn over
Please note the first ch counts as a stitch. So in Step 1, the ch 2 at the beginning counts as a dc. In Steps 2 & 3, the ch 4 at the beginning count as a tr.
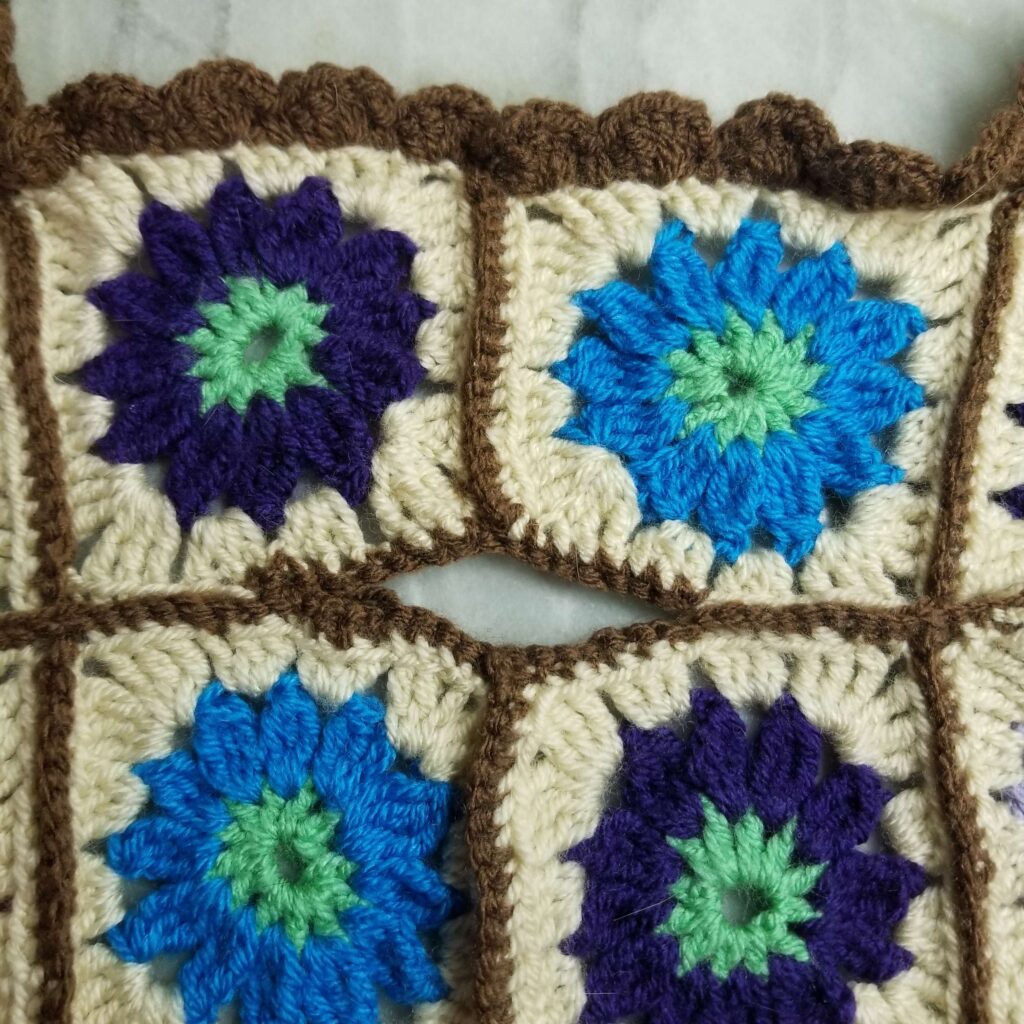
Step 1: The Center
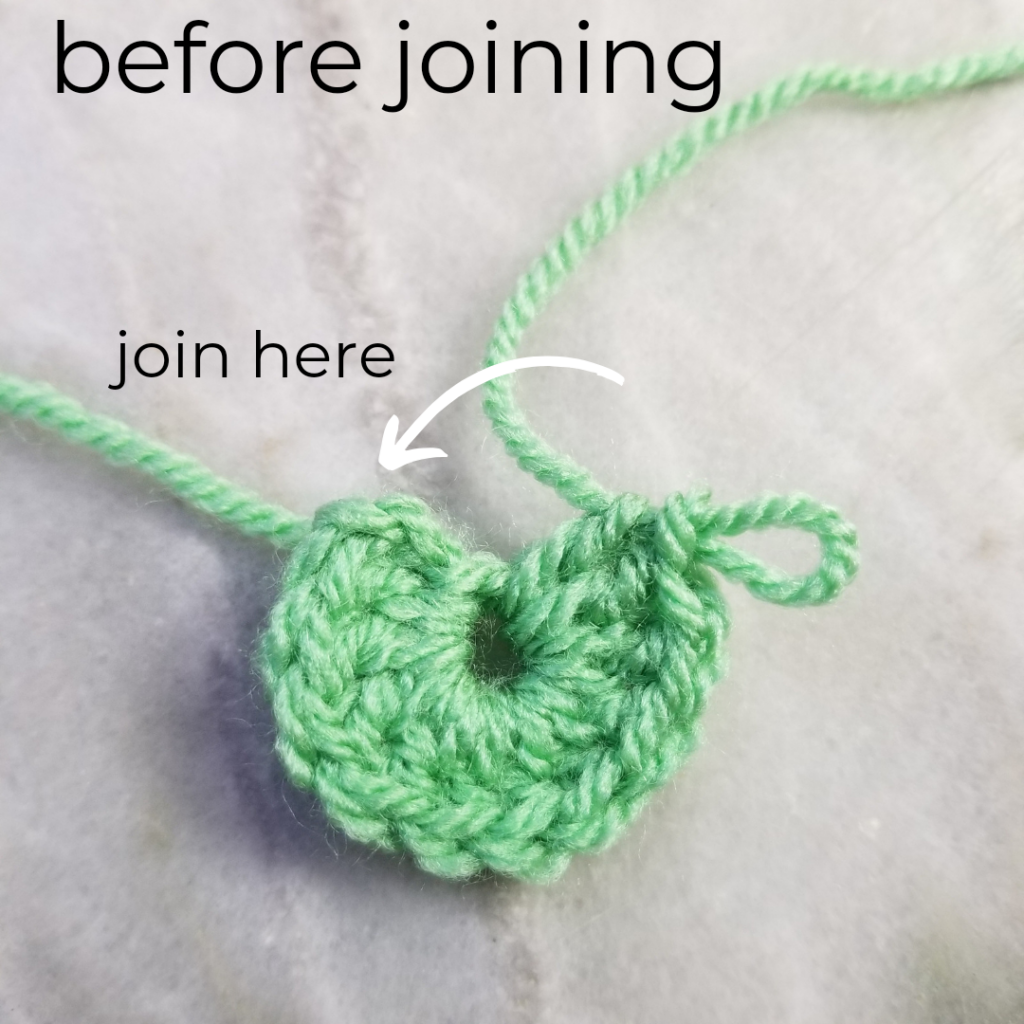
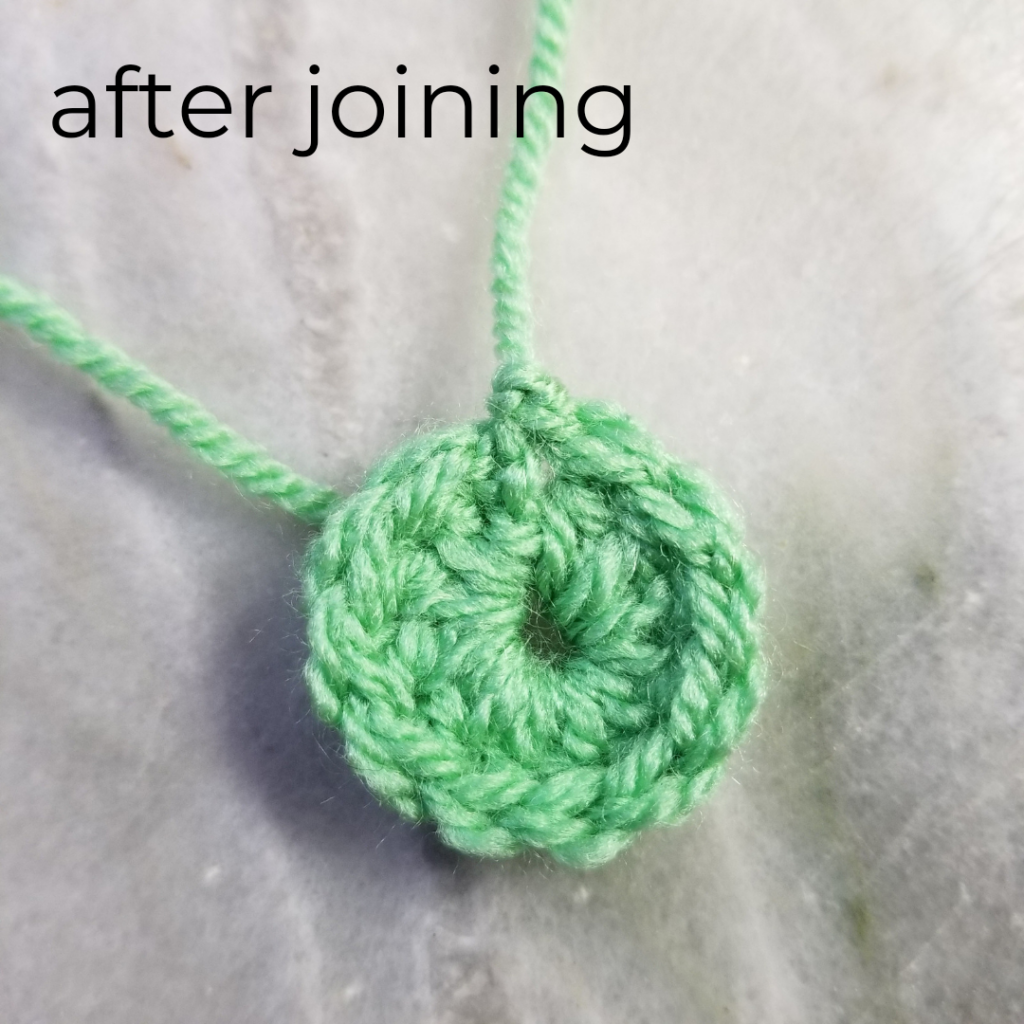
Start with center colour, ours is green, in a slip knot. ch 4, sl st to first ch, join to form a circle.
Ch 3, (this counts as the first dc), dc into the center 11 times.
You should have 12 dcs in your center colour. Sl st into 3rd ch, join.
Cut yarn and tie off.
Step 2: The Petals
Join in flower colour, here we used light blue, by just tying it in a knot through a chain space. You can start in any chain space you’d like.
ch4, 2 tr together in same chsp 12 times. (Which just means Ch 4, *yo twice, insert hook into the first chain space, yo, draw up a loop, [yo, draw through 2 loops on hook] twice; rep from * once more, yo, draw through all 3 loops on hook. Do that 12 times.) If that sounds confusing, check out this video.
Cut yarn and tie off.
Note that this video ends with three loops on the hook because it’s the first one and includes the ch4, all your other tr petals will end with four loops on the hook.
Step 3: The Border
Join in border colour, here we used a light brown. Tying it through any chain space is fine.
ch 4, 2 tr in same chsp. (The difference between these instructions and the ones in step 2, is each tr is completed before the next one begins, you are not joining them together)
ch 1, 3 dc in next chsp. Rep once more.
3 tr in next chsp, ch 3, 3 tr in same chsp, ch 1
Continue in this pattern. Which is doing 3 dcs in the same chsp, then a ch 1, 3 dcs in the next chsp, then 3 tr in the next chsp, ch 3, and 3 tr in the same chsp until you are back to where you started. You’ll finish with 3 tr in the same chsp you started with.
End with ch 3 and sl st into the 3rd ch from the beginning.
Watch the following video for the full border.
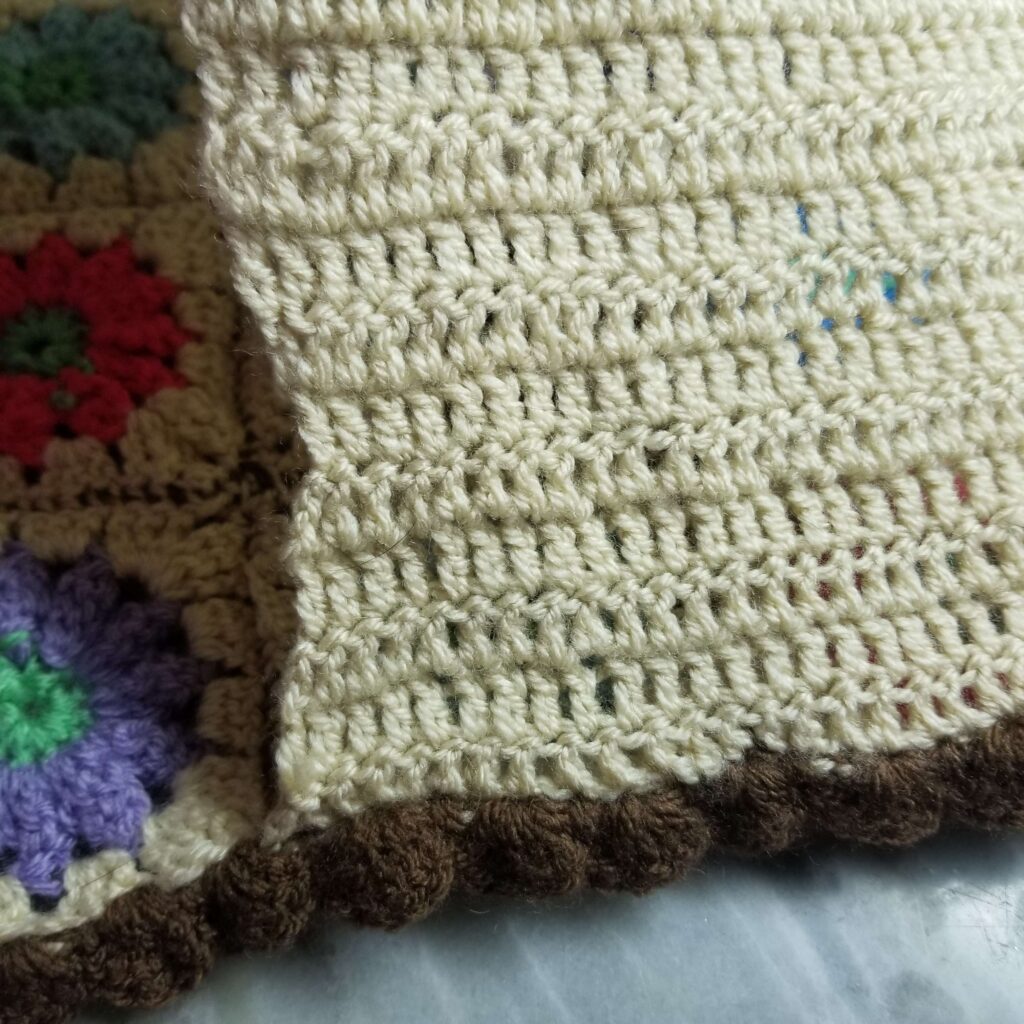
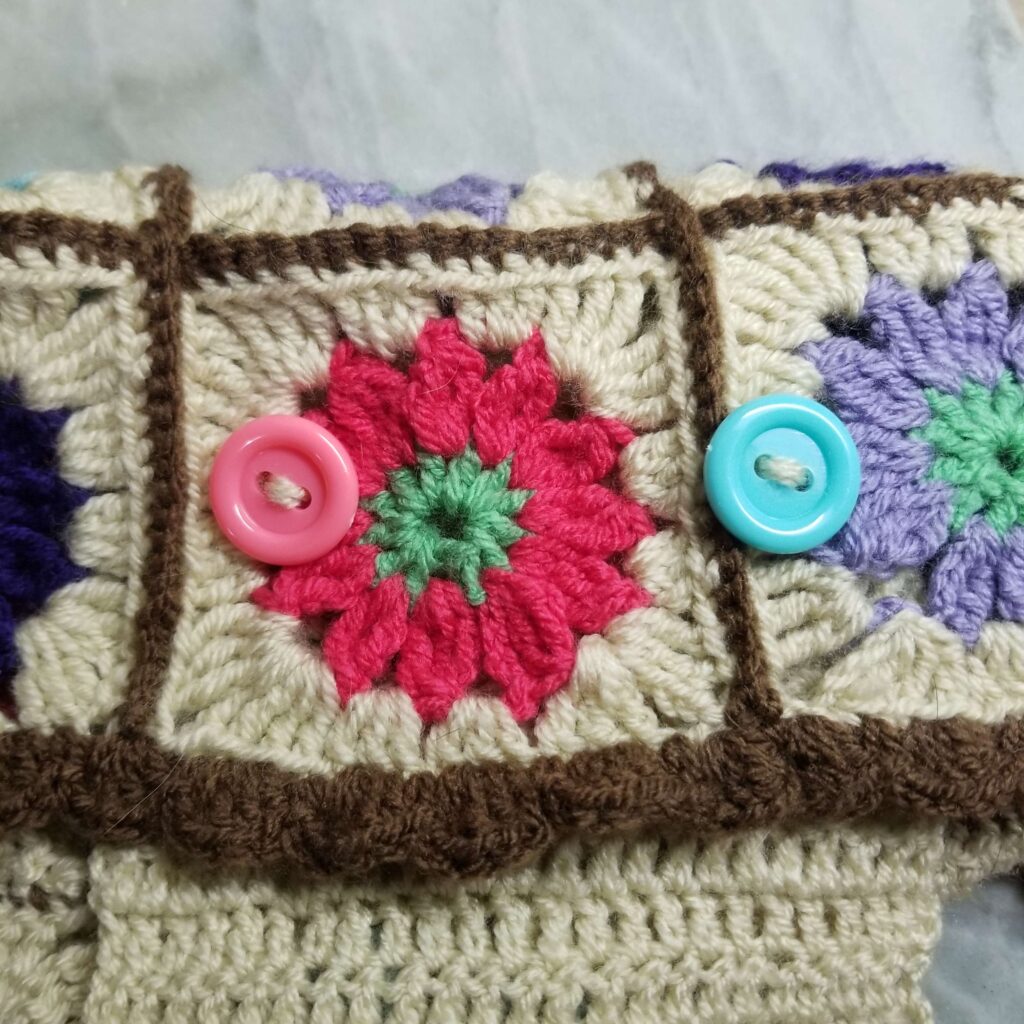
Step 4: Assembly
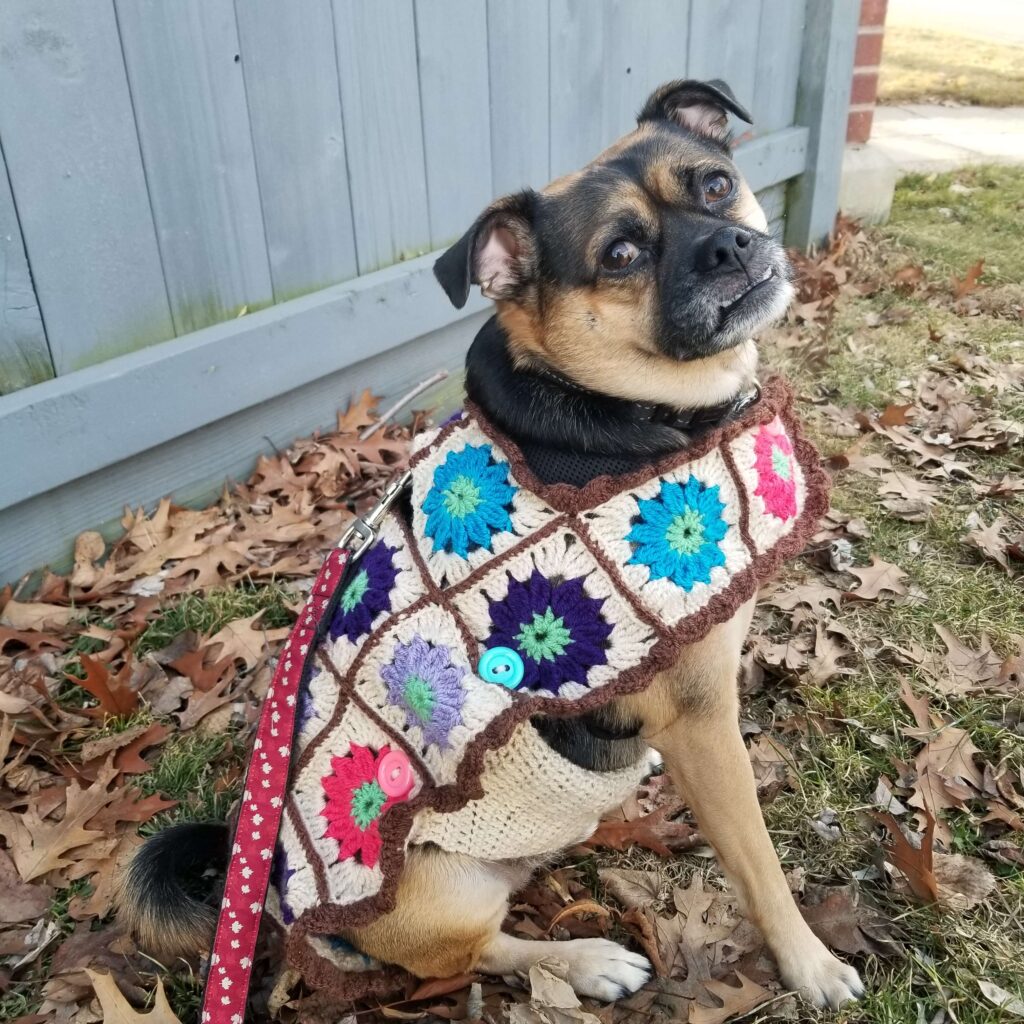
With a stack of granny squares there are so many different things you can make. Dog sweaters are one of our all time favourite things to make, so we opted for a dog coat! It essentially fits on like a cape that fastens in the front, across the chest with a button. To keep it from slipping off the back when walking, we also made a tummy band held in place with two buttons so it stays secure.
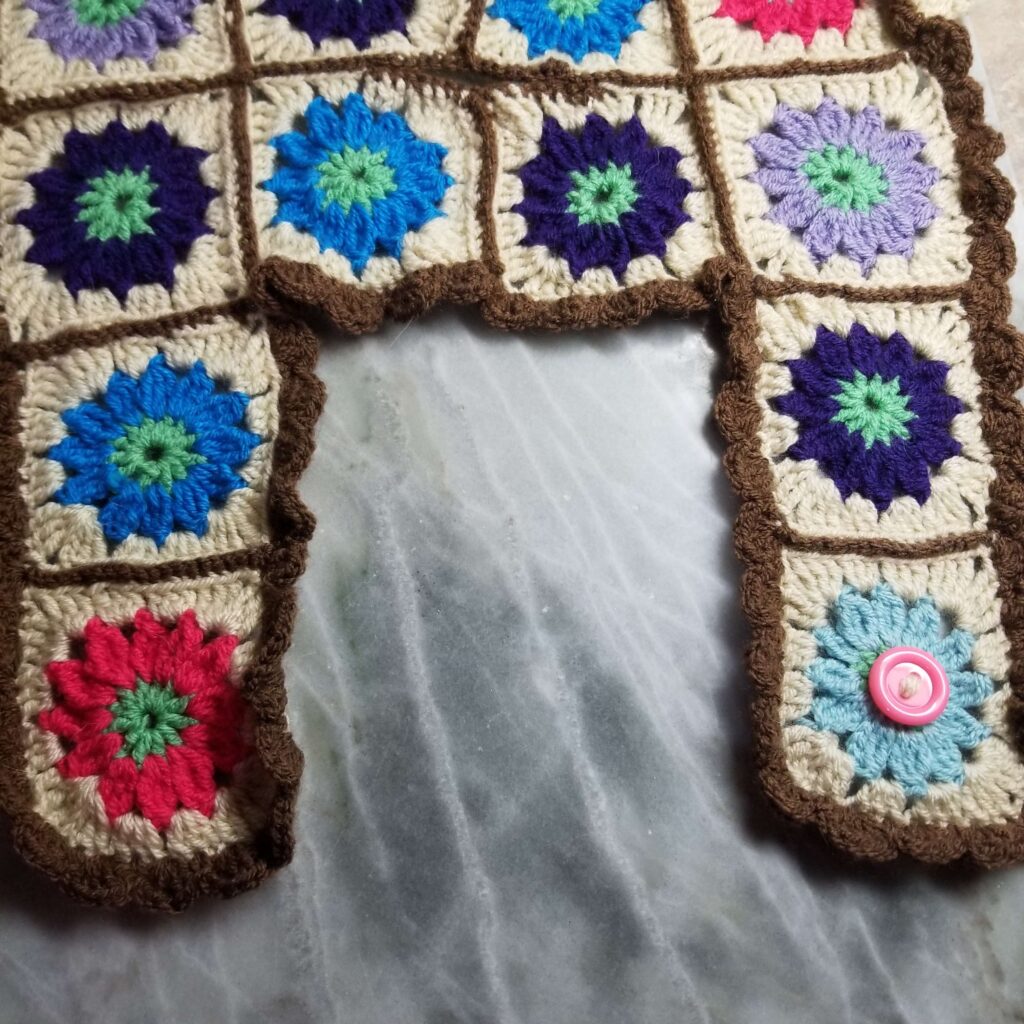
Lay out your squares on a flat surface and either measure your dog and measure your squares or attach your squares with removable stitch markers and try it on your dog!
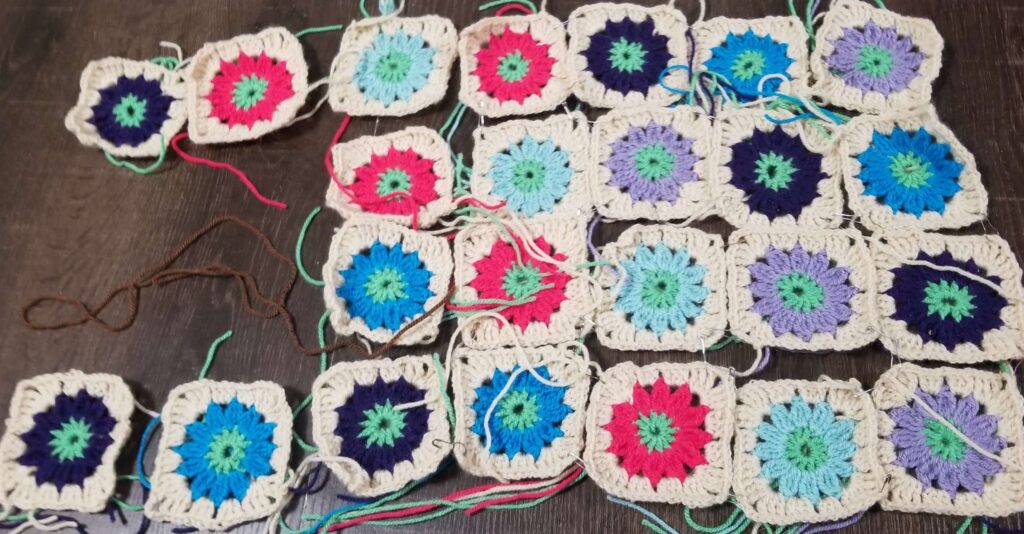
Once you try it on (or measure it), you may want to make more squares – or you might find that you’ve made too many but you can always use them for another project. When you’re happy with the final shape, it’s time to single crochet them all together. It’s best joined in strips to keep it neat. Once they’re all connected, go around the border and do a row of single crochet to give yourself a nice clean edge for the border.
Note About Leashholes
If you’re going to include a leash hole, make a note of where you want it and do a sc on each side instead of joining.
Step 5: The Border
Scalloped borders are great because they are super simple and look really polished. This one is a multiple of 4 with one more at the end. Don’t worry about having exactly the right number of stitches, especially of your coat is large. You can always skip an extra st towards the end without it being obvious.
*Sc in the first st, skip 1 st, 5 dc in the next st, skip 1 st; rep from * to last st, sc.
In this reference video I just did a border on a single square to show you how to do it.
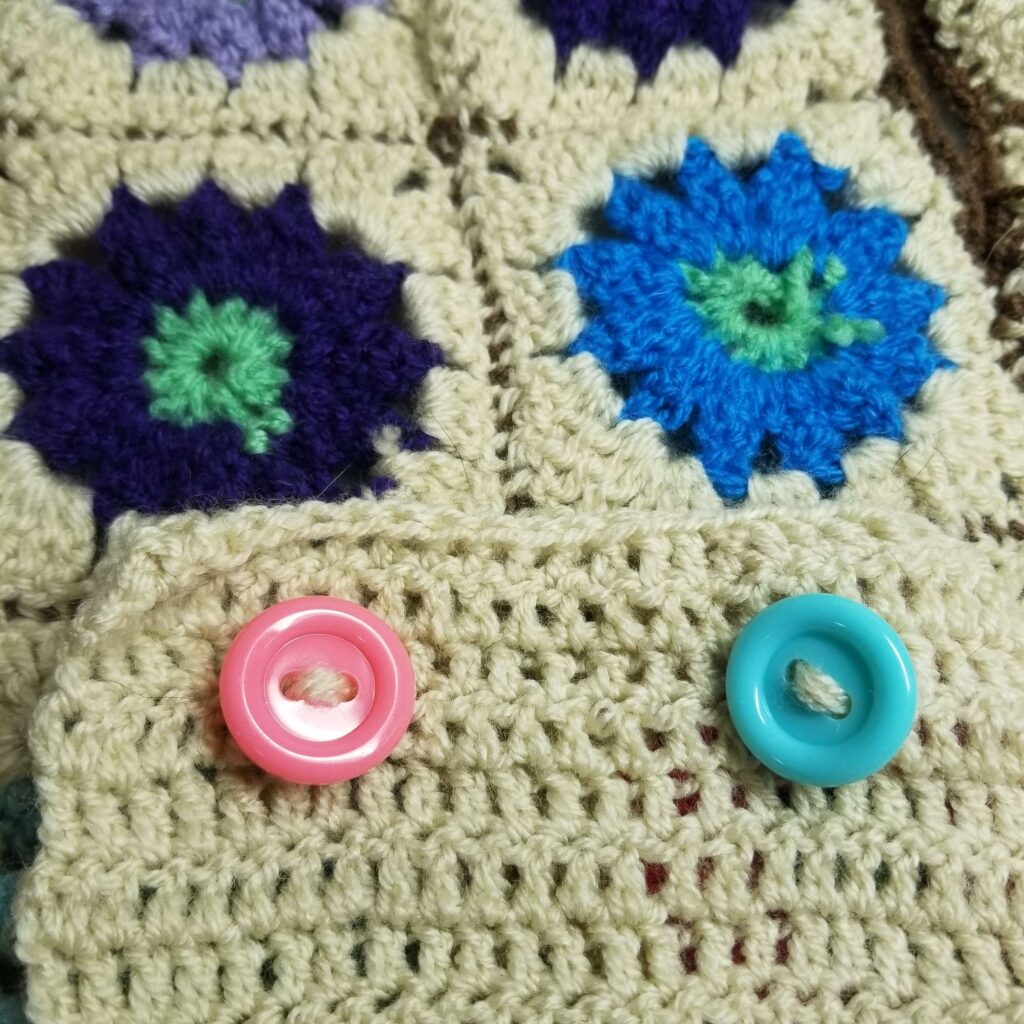
Step 6: The Tummy Band and Buttons
Adding a tummy band helps the coat to stay in place. Pick up stitches on the underside of the coat for as wide as you’d like it, depending on the size of your dog. Dc along your picked up stitches until it is long enough to comfortably reach the other side of the coat.
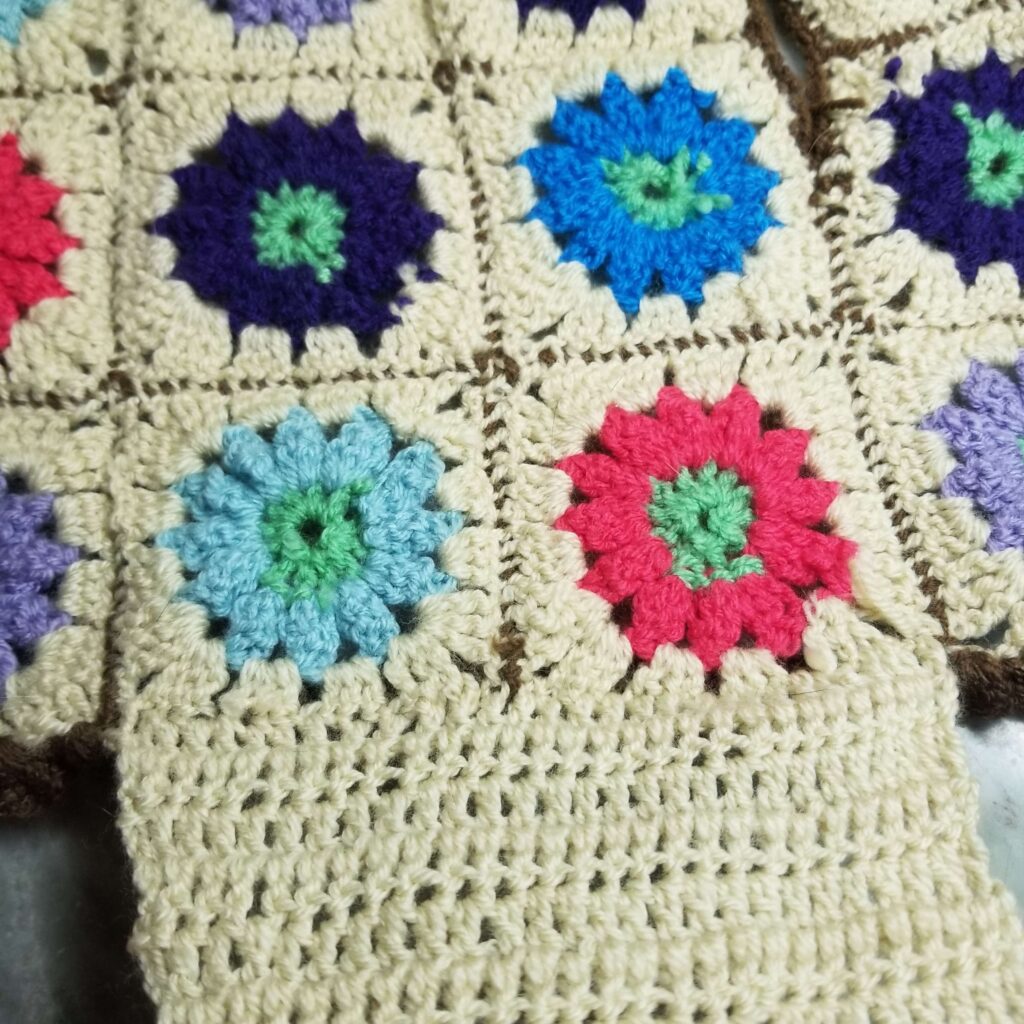
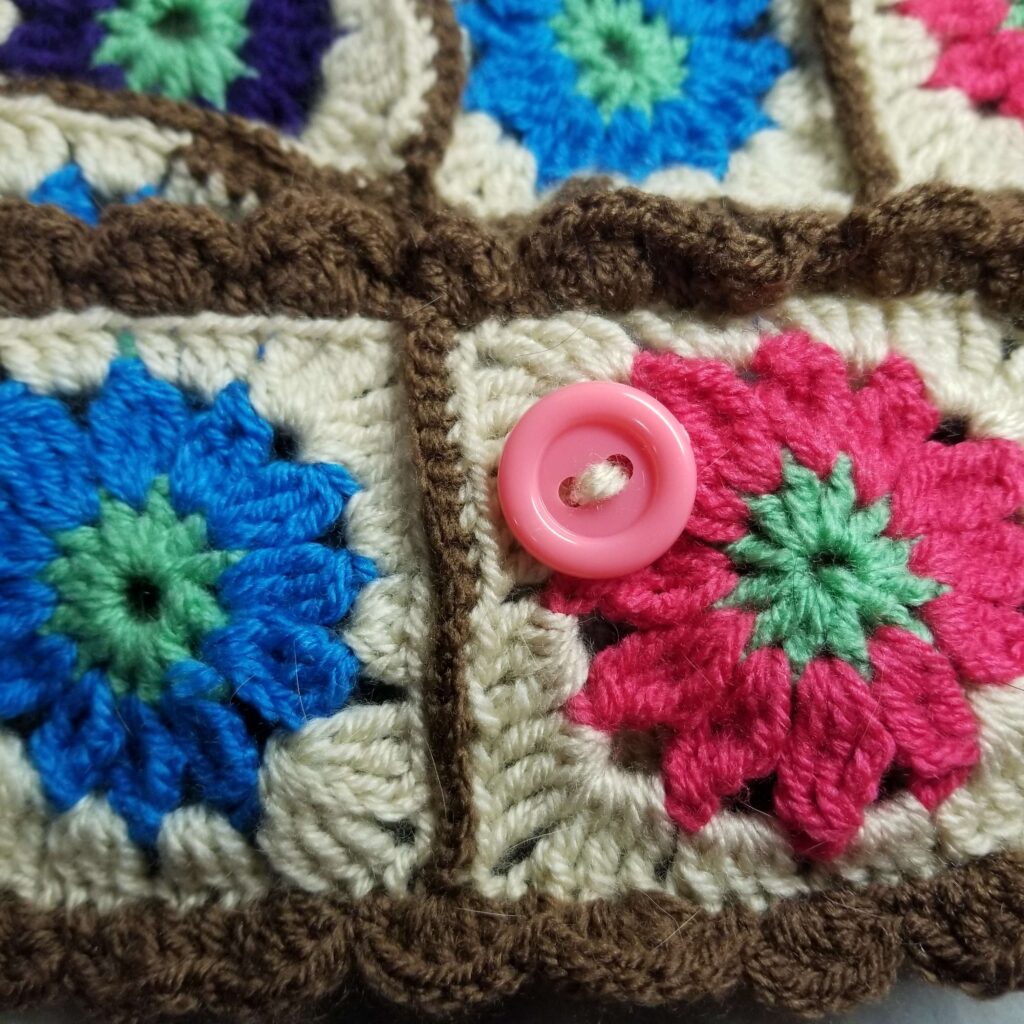
Add buttons and use the holes in your granny squares to button it up! Repeat in the front of the coat, placing a button to secure through a granny square hole.
Saw this on the Blog Hop (5/2/24) and cannot find anywhere on this site where to get the PDF for free with the code. Have the code but have no clue where to get the pdf, I’ve look for 30 minutes, even ran my cursor over every picture and still can’t locate it…so cute, would have loved to have made this for my daughters 2 fur babies…
Phew, so great that you got it!
UPDATE: I found the “Ravelry” button, it looked like an ad in themiddle of the page so I dismissed it every time, except the last time I looked closer and clicked on it and “viola” it was the actual button to take me to the site to use the code. Thanks so much for the cute pattern for the dog coat/cover…
You’re so welcome and I’m so glad it worked out.