
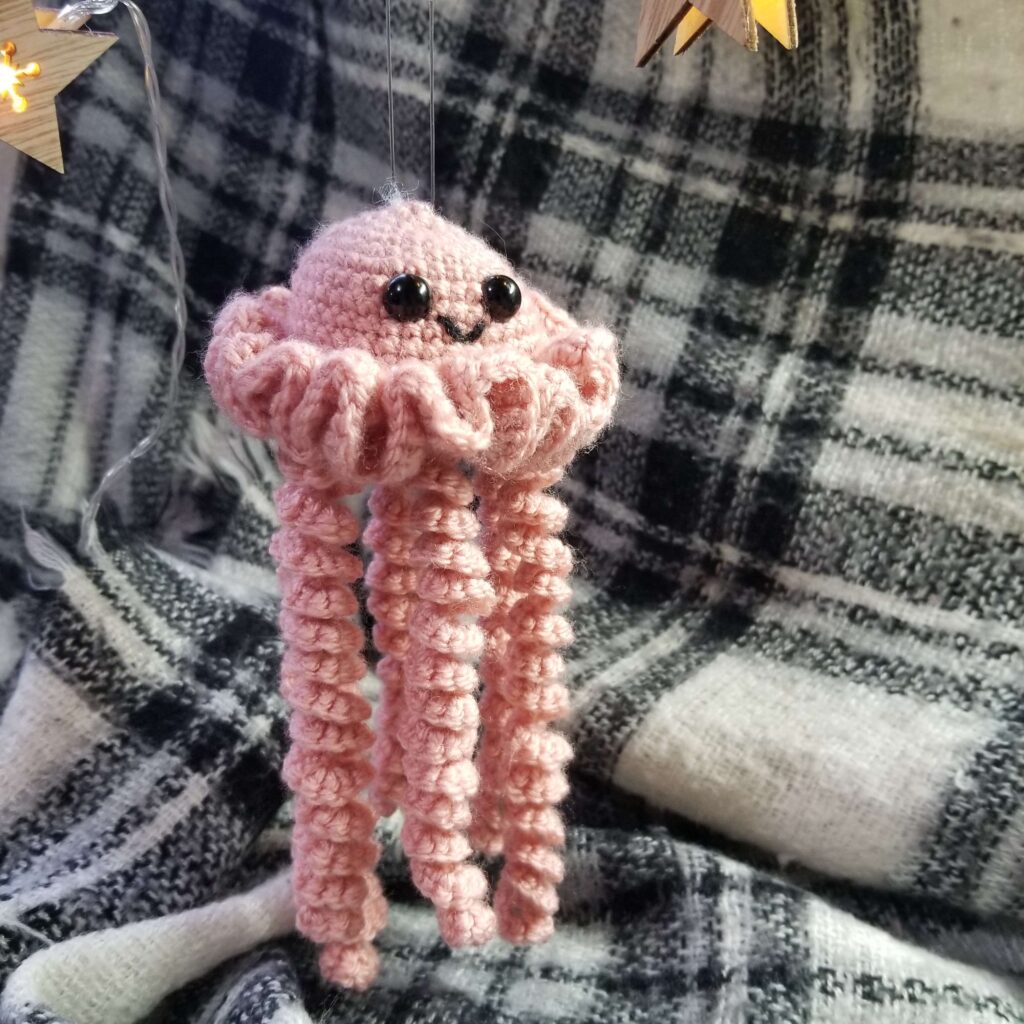
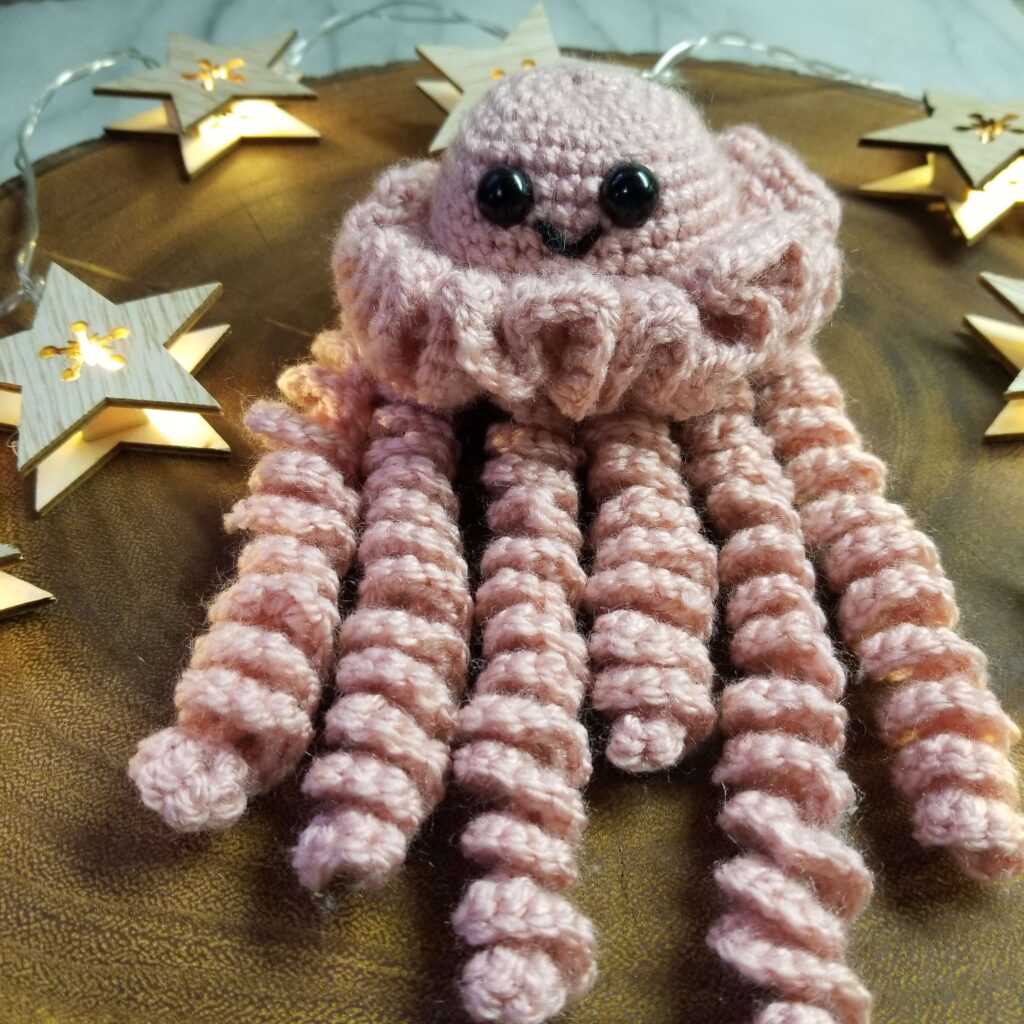
Jerry is a sweet jellyfish with big eyes and a wide smile. This adorable aquatic amigurumi is perfect for all plushie lovers. The pattern is fully seamless, meaning that there is zero sewing involved in the creation of this jelly!
Jerry the Jellyfish is worked in the round with zero excess sewing. The ruffle is worked along the edge of the jelly before the base is done. The curlicues along the base are worked as you go, creating a perfect seamless finish.
Craft: Crochet
Difficulty: Beginner
Materials: Paintbox Yarns Simply DK
Techniques: Crocheting in the round
Gauge: 14 stitches and 15 rows of sc = 2.5 x 2.5 inches
Hook Size: 3mm
Sizes: One size.
Finished Measurements: 3.5″ wide at ruffle. 6.5″ tall from top of head to bottom of tentacle.
Yardage: ~100 yards
Includes: written instructions
Also available on: 🧶Ravelry
Elevate your inbox: Access freebies and top-notch tutorials first!
Abbreviations:
mr – magic ring
ch – chain
st – stitch
sc – single crochet
dc – double crochet
inc – increase
dec – decrease
blo – back loop only
flo – front loop only
slst – slip stitch
Worked in endless spiral, be sure to use a stitch marker.
Safety eyes placed between rows 7 & 8.
The ruffle is crocheted into the front loops left behind after round 13 is done.
Ch3 at beginning of ruffle does not count as a stitch.
Begin Pattern:
Body:
Round 1: 6sc in mr (6)
Round 2: 6inc (12)
Round 3: sc, inc x6 (18)
Round 4: 2sc, inc x6 (24)
Round 5: 3sc, inc x6 (30)
Round 6: 4sc, inc x6 (36)
Round 7-12: sc around (36)
Round 13: in BLO, sc around (36)
Ruffle:
Round 14: ch3, 4dc in 1 st, ch2 x36. slst to first dc. (144)
Round 15: ch1, sc in each dc, 2sc in each chsp. (216)
Base:
slst along ch3 at start of ruffle to reach base.
Round 16: 3sc, ch 46, 3sc in each ch, sc in next st, dec x6 (30)
Round 17: 3sc, dec (24)
Round 18: 2sc, dec (18)
Round 19: sc, dec (12)
Round 20: 6dec (6)
Stuff jellyfish. Tie off, weave in loose end through front loop of each st left over. Tug tightly on end to close, weave in end.
Have fun with this pattern and tag us on Instagram @craftopia.collective – we love to see your finished makes!
Do you have a video for this, especially the curlique spacing?
We don’t right now, but we are planning to. We can email you once it’s ready. 🙂